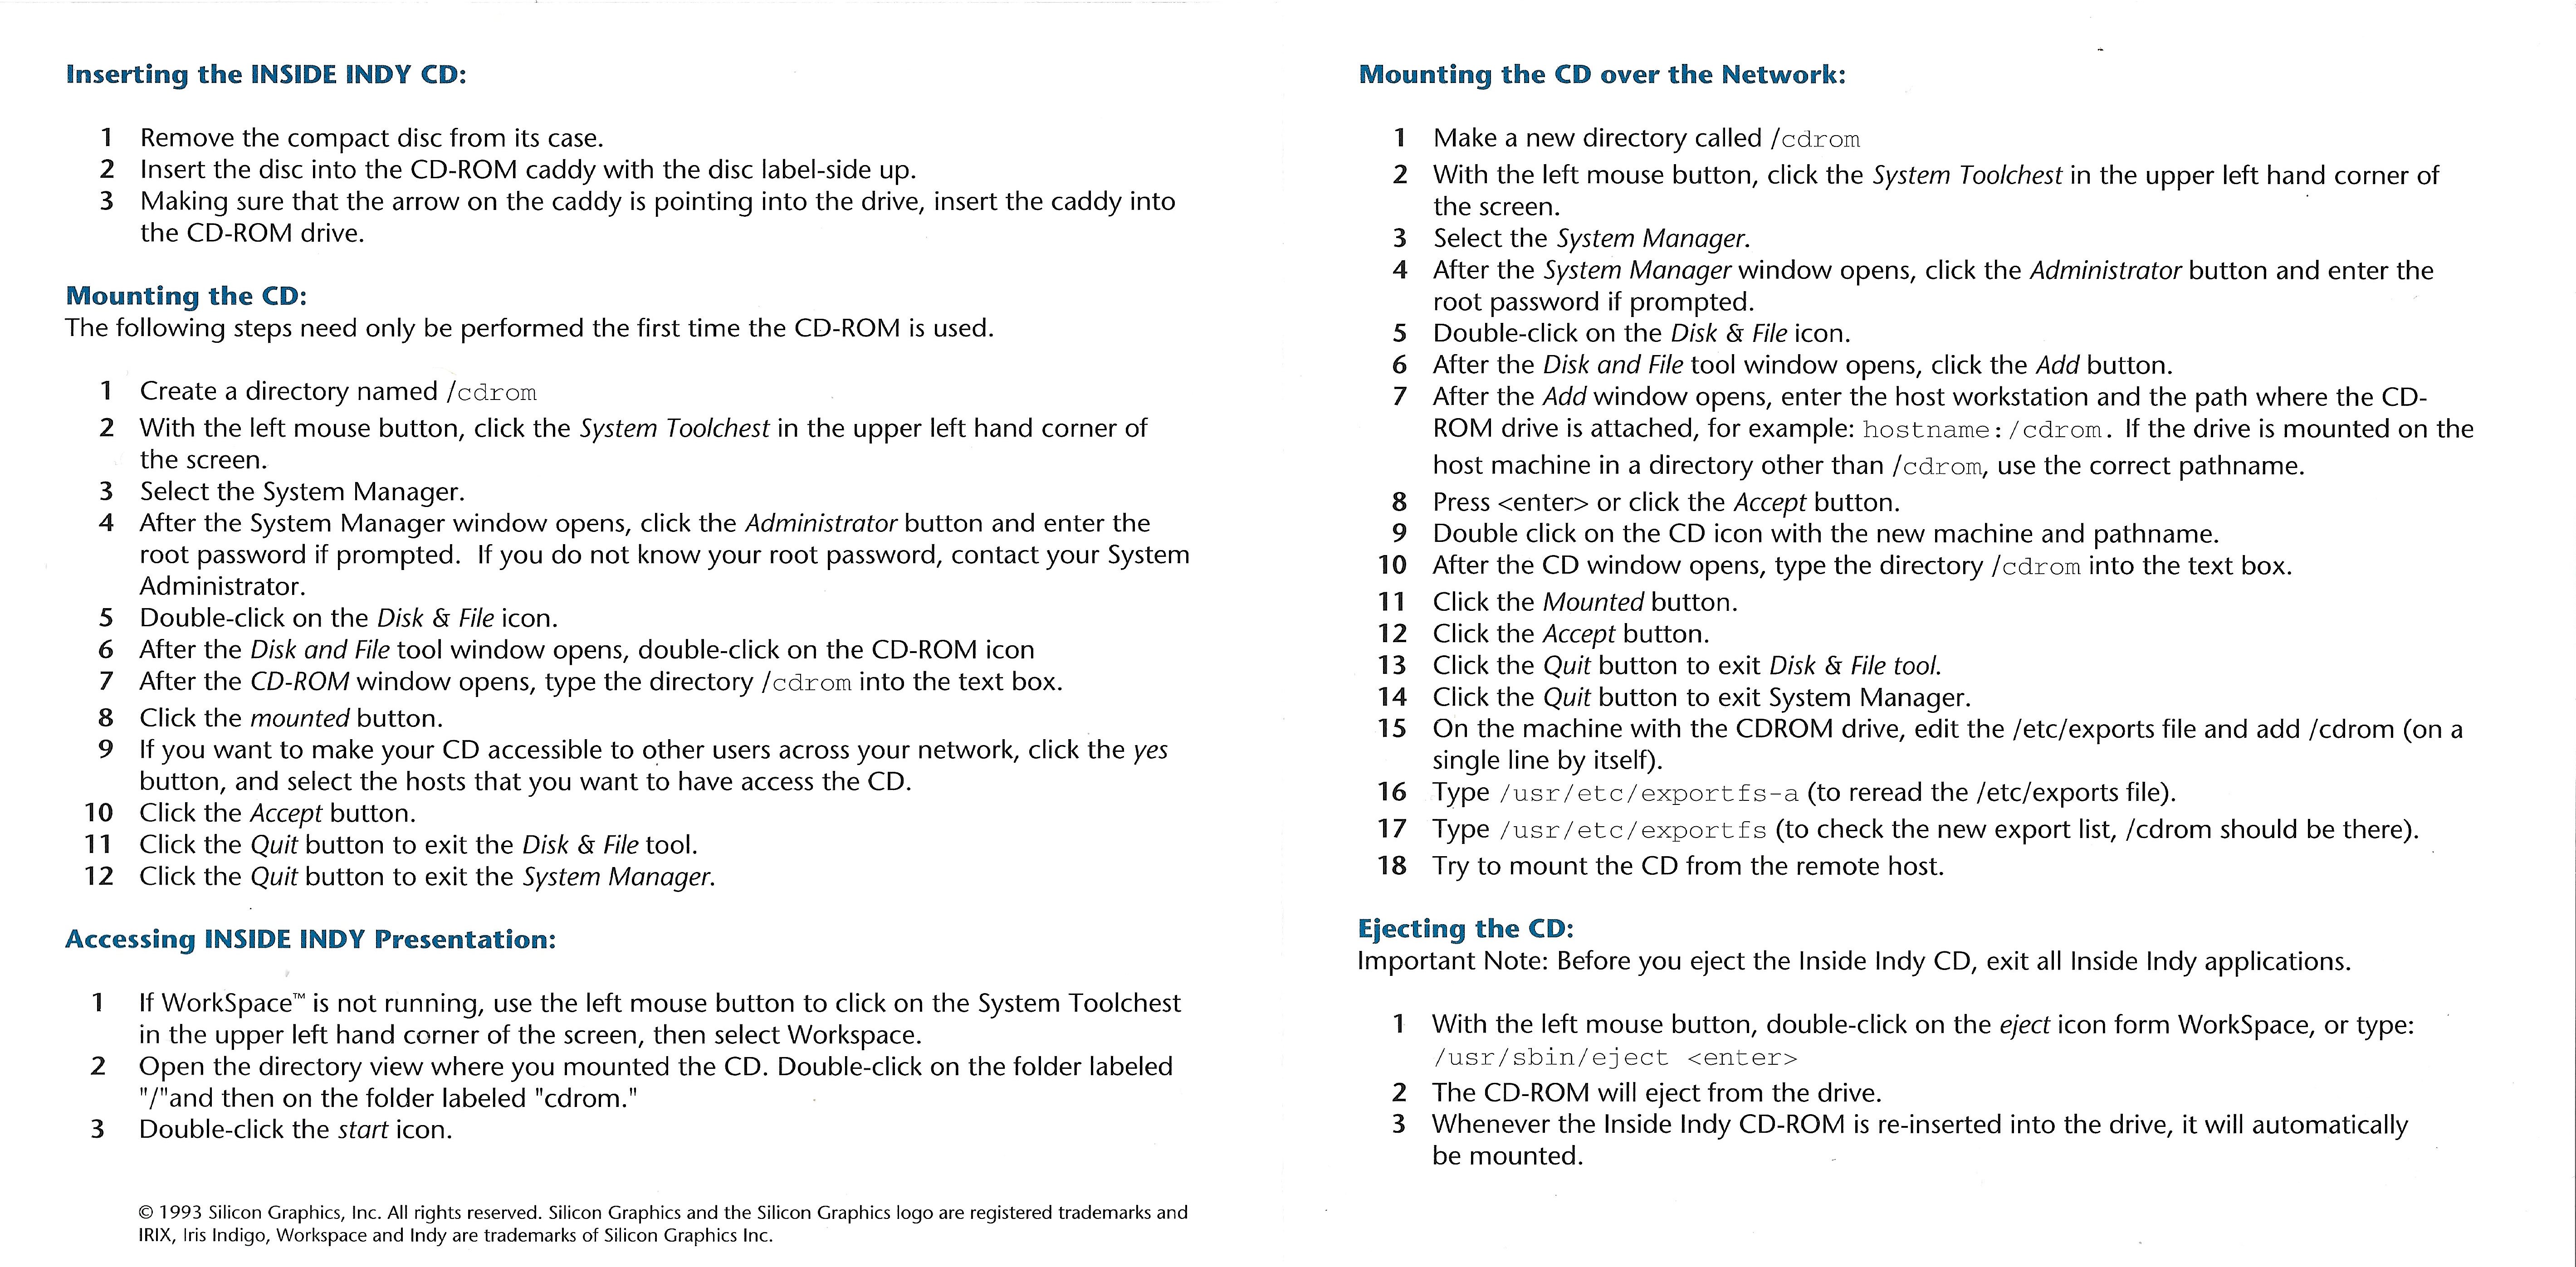
Labels:text | screenshot | font | number OCR: Inserting the INSIDE INDY CD: Mounting the CD over the Network: 1 Remove the compact disc from its case. 1 Make a new directory called /cdrom 2 Insert the disc into the CD-ROM caddy with the disc label-side up. 2 With the left mouse button, click the System Toolchest in the upper left hand corner of 3 Making sure that the arrow on the caddy is pointing into the drive, insert the caddy into the screen. the CD-ROM drive. 3 Select the System Manager. 4 After the System Manager window opens, click the Administrator button and enter the Mounting the CD: The following steps need only be performed the first time the CD-ROM is used. root password if prompted. 5 Double-click on the Disk & File icon. 6 After the Disk and File tool window opens, click the Add button. 6 1 Create a directory named /cdrom 7 After the Add window opens, enter the host workstation and the path where the CD- 7 2 With the left mouse button, click the System Toolchest in the upper left hand corner of ROM drive is attached, for example: hostname : /cdrom. If the drive is mounted on the the screen. host machine in a directory other than /cdrom, use the correct pathname. 3 Select the System Manager. 8 Press <enter> or click the Accept button. 4 After the System Manager window opens, click the Administrator button and enter the 9 root password if prompted. If you do not know your root password, contact your System Double click on the CD icon with the new machine and pathname. 10 Administrator. After the CD window opens, type the directory /cdrom into the text box. 5 Double-click on the Disk & File icon. 11 Click the Mounted button. 6 After the Disk and File tool window opens, double-click on the CD-ROM icon 12 Click the Accept button. 7 After the CD-ROM window opens, type the directory /cdrom into the text box. 13 Click the Quit button to exit Disk & File tool. 14 Click the Quit button to exit System Manager. 8 Click the mounted button. 9 If you want to make your CD accessible to other users across your network, click the yes 15 On the machine with the CDROM drive, edit the /etc/exports file and add /cdrom (on a button, and select the hosts that you want to have access the CD. single line by itself). 10 Click the Accept button. 16 Type /usr/ etc/ exportfs-a (to reread the /etc/exports file). 11 Click the Quit button to exit the Disk & File tool. 17 Type /usr/ etc/ exportfs (to check the new export list, /cdrom should be there). 12 Click the Quit button to exit the System Manager. 18 18 Try to mount the CD from the remote host. Accessing INSIDE INDY Presentation: Ejecting the CD: Important Note: Before you eject the Inside Indy CD, exit all Inside Indy applications. 1 If WorkSpace™ is not running, use the left mouse button to click on the System Toolchest in the upper left hand corner of the screen, then select Workspace. 1 With the left mouse button, double-click on the eject icon form WorkSpace, or type: 2 Open the directory view where you mounted the CD. Double-click on the folder labeled /usr/sbin/eject <enter> "/"and then on the folder labeled "cdrom." 2 The CD-ROM will eject from the drive. 3 Double-click the start icon. 3 Whenever the Inside Indy CD-ROM is re-inserted into the drive, it will automatically be mounted. @ 1993 Silicon Graphics, Inc. All rights reserved. Silicon Graphics and the Silicon Graphics logo are registered trademarks and IRIX, Iris Indigo, Workspace and Indy are trademarks of Silicon Graphics Inc.